|
 How To's
This
section will contain Misc. how to articles. More coming soon!
 Chrome
handles for fresh air vents Chrome
handles for fresh air vents
HEI wiring and engine harness fabrication
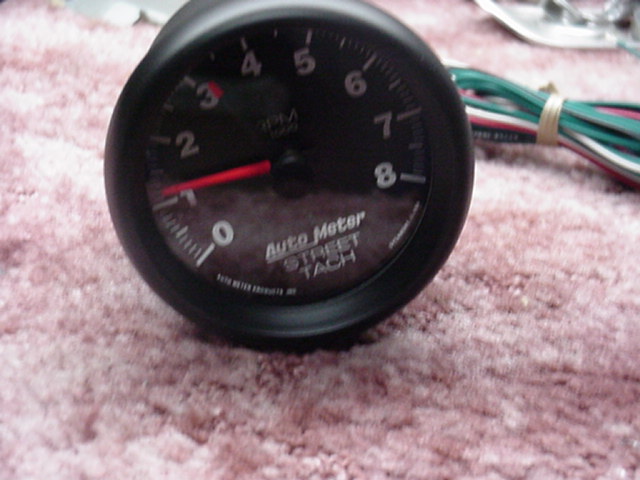
 Autometer
2894/2895 tach install for 63-65 clusters! Autometer
2894/2895 tach install for 63-65 clusters!
I credit Travis
Newhouse with the
information provided here. He was kind enough to give me a quick rundown
on how to do the install. The pictures displayed here are from the
installation of the tach in my instrument cluster. NOTE:
Other model
tachometers will fit, they must be external mount type and have a diameter of 3
3/4", but may interfere with the inner dash brace. If done correctly,
the Autometer 2894/2895 tach will not interfere with this dash brace!
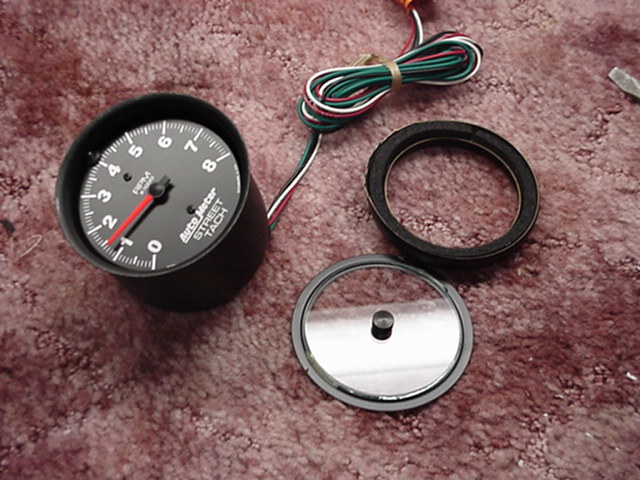
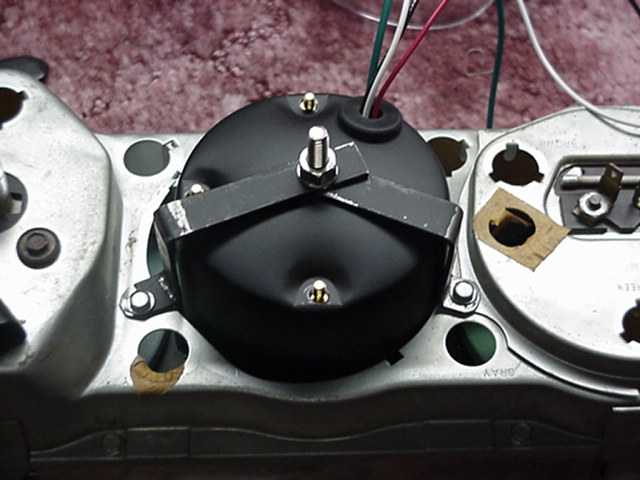
Step 1.) Remove external mount base and steel
strap. Retain steel strap and discard base.
When finished, it should resemble the picture.
Click on pics for larger image!
Step 2.) Remove
outer glass retaining bezel by gently prying up the edges NOTE:
This will permanently blemish the tach,
and it will no longer be suitable for external mount. Remove glass
insert.
Step 3.) Remove 3
mounting nuts on the rear of the tach mounting cup. Carefully remove the
the tach assembly from
the cup,
pulling the complete harness through the rear grommet.
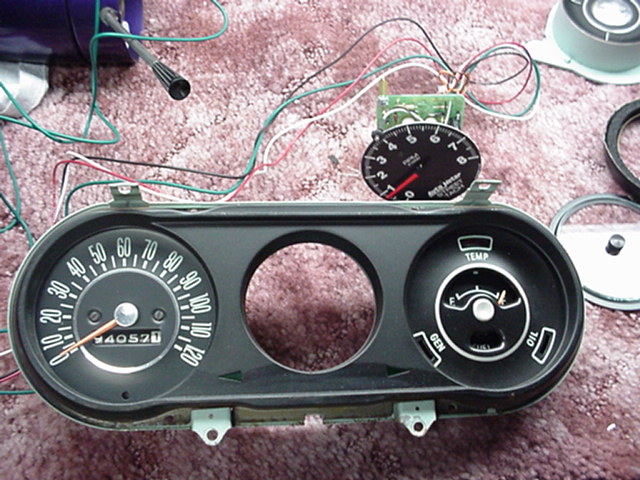
Step 4.) Turn
cluster over. Remove center insert or clock by removing 2 screws, pull
center out
Step 5.)
Insert tachometer assembly back into mounting cup. Insert cup and tachometer
assembly in cluster center from
the rear as show in picture. Lift instrument cluster above your head and
turn tach to desired position. Note postition of
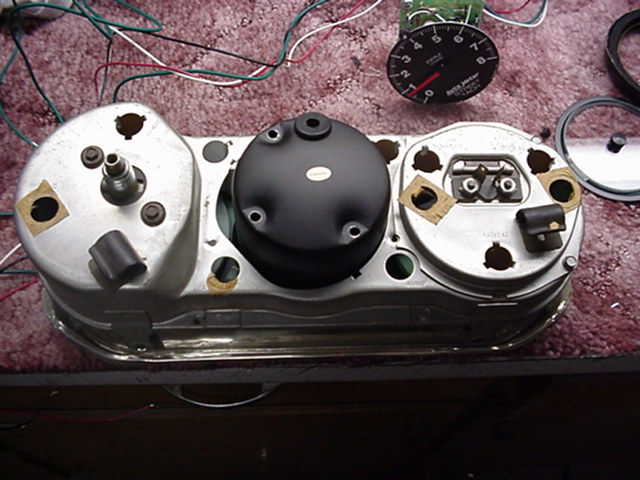
of mounting cup on rear of cluster. Now remove mounting cup, pull tach
assembly out of cup and reinsert cup in
cluster noting the before position. Use Steel strap removed in Step 1 to
fashion mounts. The best way to secure the
mounts is to mount them to the cluster utilizing the 2 screws removed in Step
4, in the same location you removed them
from.
Step 6.)
As you can see, I chose to drill a hole through the center of the cup.
Although this method will work well, I
suggest you secure the mounts to the side of the cup and not the top. If
the screw in the center of the cup is too long,
it may interfere with the inner dash brace. I initially had this
problem, but trimmed the screw down and it fit snugly.
After you design and secure your mounts, install the tach assembly back into
the mounting cup and secure the whole
assembly to the cluster. TIP: If
you are not satisfied with the fit around the edges of the cluster, look
inside the tach
bezel that you removed in Step 1, you will find some foam, use that to fill
the space around the mounting cup.
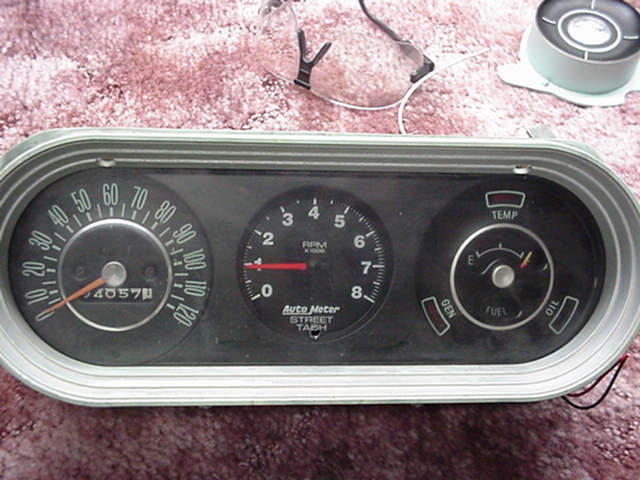
Step 7.) Your
finished product should look similar to the picture!
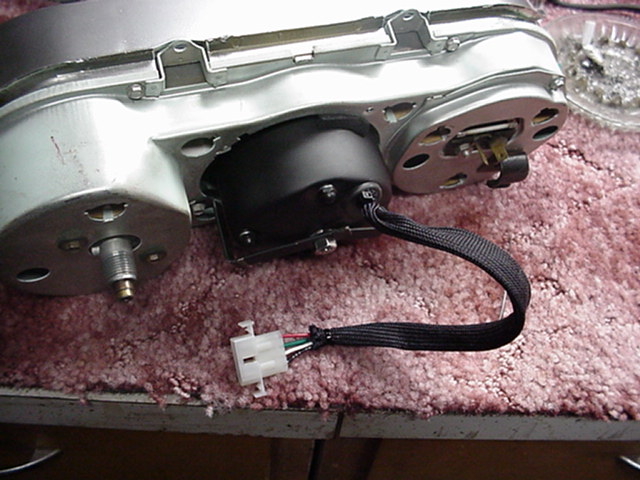
Step
8.(optional). If you are concerned about "Hard Wiring" the tach in,
pick up a standard 4 pin connector at your local
electronics store. This will create a quick disconnect in case you need
to remove the cluster at a later date!
Questions?


|