Note: In my install, I do not use the stock radiator spacer!!!
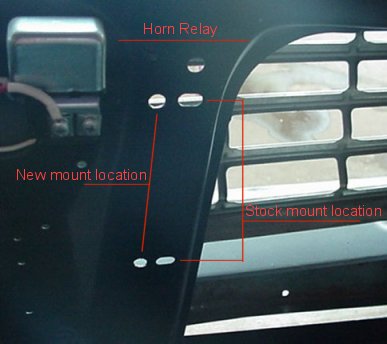
1.) First thing first, you must trail fit the radiator before going any farther! Now, 62/63 cars will only have one set of holes on the drivers side support (reference pic "stock mount location") These mounts were designed to fit the stock 6 cylinder radiator, therefore, we must drill some new holes. Starting in 64 with the introduction of the V8, the factory drilled 2 sets of holes, one for the v8 radiator, and one for the I6 radiator. If you have a 64 or up, you should be able to skip this step and bolt the radiator directly in your car without modification to the support.
Note: If your brake line is run in the stock location, ensure that you have clearance between the radiator and brake line before drilling your new holes!!!
2.) For 62/63 cars: Make sure you measure the distance for the new mount holes at least twice, I cannot stress that enough! Your new holes should be made using a 3/8" diameter drill bit. I measured my holes at 3/4" center to center from the old hole. Please, make sure you measure yours, do not rely on my measurements!!!!(Reference pic "New mount location")
3.) Once your holes are drilled, trail fit your radiator again to ensure the holes do not need any "enlarging".
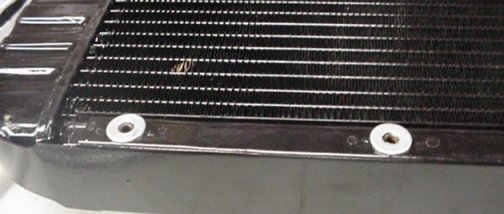
4.) Ok, the fins on this radiator stick up past the mount about 1/16", probably because it is designed to be used with the stock spacer. However, I am not utilizing the stock spacer and did not want to smash any of the fins. My solution to this dilemma was to use some 3/8"(inner diameter) washers to make up the difference. You do not have to do this, but I did to save the fins. I used rubber cement to hold the washers in place to ease installation.
5.) Mount your radiator to the radiator support. Pay special attention to the stock brake line that runs under the radiator
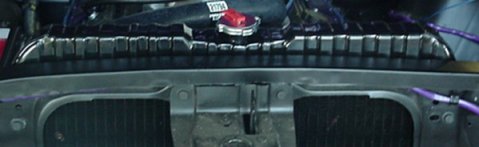
6.) Install your radiator hoses, and tranny cooling lines if you have them.
7.) Here it is without a shroud and fan.

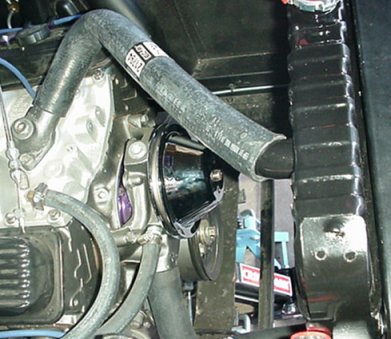
8.) Here we have the 66/67 shroud mounted with a 17" Flex fan and 2" spacer. Please note that I had to change to a different thermostat housing to provide enough clearance between the shroud and the hose. With the standard thermostat housing, the upper hose would crush about 1/2" due to the design of the shroud and location of the inlet. Here I am using a polished 45 degree swivel housing from summit racing. This housing costs about $35, but functionality and looks are greatly improved over the original style housing.
9.) Enjoy your new radiator!